Bake S'mores Layer Cake Delightfully Sweet
Discover the joy of my Bake S'mores Layer Cake Delightfully Sweet! With rich layers of chocolate and marshmallow goodness, it's a treat for every celebration.

- Bake S'mores Layer Cake Delightfully Sweet: A Nostalgic Delight
- Your Essential Ingredients Guide for Bake S'mores Layer Cake
- Unlocking Professional Cooking Techniques
- Essential Preparation Steps
- Step-by-Step Process
- Expert Techniques
- Success Strategies
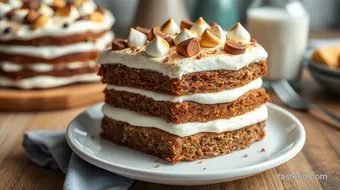
- Pro Tips & Secrets for Baking Your S'mores Layer Cake
- Perfect Presentation for Your Cake
- Storage & Make-Ahead Tips
- Creative Variations to Try
- Complete Nutrition Guide
- Conclusion: Your Sweet Adventure Awaits!
- Frequently Asked Questions
- Recipe Card
Bake S'mores Layer Cake Delightfully Sweet: A Nostalgic Delight
Seriously, who doesn’t love the taste of s'mores ? the moment the gooey marshmallow meets that rich chocolate, and all embraced by crunchy graham crackers—it’s like fireworks on your taste buds.
I remember those summer nights around the campfire, trying to perfect the art of roasting marshmallows. and then the idea hit me like a light bulb turning on: why not capture that delicious nostalgia in a cake? that’s how i stumbled upon the idea of bake s'mores layer cake delightfully sweet .
It’s not just a dessert; it’s a walk down memory lane!
Imagine serving this layered chocolate dessert at your next get-together. the smiles on faces as they dive into those rich chocolate cake layers , fluffy marshmallow frosting, and that unforgettable graham cracker crust? total game changer.
Unpacking the Recipe: A Bit of History
The origins of s'mores are as delightful as the dessert itself! it all started back in the 1920s, as camping recipes became popular in the u.
S. yet here we are, in a world where s'mores have morphed into a fantastic layered cake recipe . this cake is a modern twist on a classic campfire treat, and it retains that nostalgic feel while being accessible for any occasion—whether it’s a birthday bash or just another monday night craving.
Now, as for the effort involved, this recipe is generally medium in difficulty. you’re looking at about 1 hour and 20 minutes from prep to done.
It might seem like a lot, but trust me, the taste is so worth it! and let’s talk costs: it’s pretty budget-friendly too.
Most ingredients are staples you probably have lying around already, and it serves 12 generous slices, perfect for sharing!
Why You’ll Love This Cake
First off, let’s get to the good stuff—the health benefits (believe it or not!). while it’s no health food, this cake can also pack in some flavors that’ll make your heart sing! using quality chocolate and real marshmallows can turn this dessert into a true celebration of flavors.
Plus, think of those sweet childhood memories with every delicious bite!
This cake is ideal for any special occasion . whether you're tossing a summer barbecue or throwing the ultimate birthday party, people will rave about your serving of this delicious cake.
And honestly? it stands out from other easy cake recipes out there, making it one of the best sweet treats for parties .
Key Benefits That Make It Stand Out
So why should you add this cake to your baking repertoire? for starters, it’s an indulgent treat that hits all the right notes.
The combination of fluffy marshmallows, dark chocolate, and that crunchy graham cracker crust is pure bliss. you can play around with s'mores flavor combinations if you want to get adventurous.
And if you want to get fancy, let’s talk about creative cake decorating ! a few extra toasted marshmallows on top or a drizzle of chocolate sauce will take your presentation to a whole new level.
On top of it all, if you're accommodating different diets, don’t sweat it. you can easily adapt this into gluten-free dessert options or switch up ingredients to fit dietary needs.
Everybody gets to enjoy a slice!
A Sweet Transition to the Ingredients
So, ready to whip up this delightfully sweet layer cake? in the next section, i’ll break down all the ingredients you’ll need.
Grab your mixing bowls, and let’s get baking that unforgettable bake s'mores layer cake delightfully sweet !
Your Essential Ingredients Guide for Bake S'mores Layer Cake
Let’s talk about baking! if you’re itching to impress your friends and family with a show-stopping treat, you’re gonna love this bake s'mores layer cake delightfully sweet .
But before we dive into the layers of rich chocolate cake and fluffy marshmallow frosting, let’s get you set up with some essential ingredients.
Get ready to unlock the secret to creating one of the ultimate nostalgic desserts .
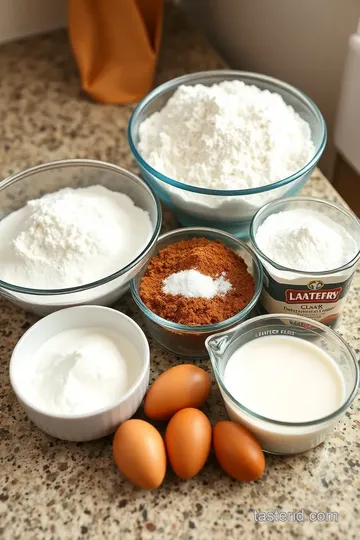
Premium Core Components
Okay, here’s the lowdown on the core ingredients you’ll need:
- Chocolate Cake Layers:
- 2 cups (250 g) all-purpose flour - This is your foundation.
- 2 cups (400 g) granulated sugar - Sweetness is life!
- 3/4 cup (65 g) unsweetened cocoa powder - Only the best for our chocolate lovers dessert!
- 1 ½ teaspoons baking powder and baking soda - Don’t forget these, or you’ll end up with a flat cake.
- 1 teaspoon salt - It makes everything pop!
Here’s a little pro tip : Always check expiration dates on your baking powder and soda. If they’re old, your cake will flop—literally!
- Quality indicators: Fresh flour should smell nutty, not stale. Cocoa powder? No lumps, please!
Signature Seasoning Blend
Let’s not forget that sweet element that brings it all together!
- Marshmallow Frosting:
- You’ll need 1 cup (240 ml) heavy cream whipped to soft peaks. Think of it as your canvas!
- 1 1/2 cups (180 g) powdered sugar - This brings the sweetness level up.
- 1 ½ cups (210 g) mini marshmallows - These babies transform the frosting into gooey goodness.
Now, if you want to get fancy (and who doesn’t?), consider adding a splash of vanilla extract . Trust me, it kicks the flavor into high gear.
Smart Substitutions
Baking can be tricky, so don’t panic if you’re missing something. Here’s what you can do:
- Common alternatives: Out of cocoa powder? Try carob—though it has a different flavor, it works.
- Emergency replacements: No heavy cream? Full-fat coconut milk can save the day for a dairy-free marshmallow fluff recipe .
And honestly, if you’re feeling adventurous, toss in gluten-free flour . It’s all about fitting your dietary needs without sacrificing taste.
Kitchen Equipment Essentials
Now, onto the tools you can’t live without while creating this delicious masterpiece.
- Must-have tools:
- You’ll need three 9-inch round cake pans to make those beautiful layers.
- An electric mixer is a must—give your wrist a break!
- Don’t forget a spatula to smooth out that frosting like a pro.
Pro tip: A bench scraper can help get those sides looking slick and clean.
The Final Piece of Cake
By now, you’ve got all your ingredients lined up, and your tools ready to go. this cake is about to become the star of your next gathering—think of that big wow factor when you slice into those layers and reveal luscious chocolate and fluffy marshmallow.
Get ready! we’re about to move into the fun part where we actually bake this incredible s'mores cake recipe ! you’ll learn how to layer those cake beauties, spread on that marshmallow frosting, and maybe even get crafty with those decorations.
It’s all about having fun!
So, don’t you dare go anywhere—smooches and sweets are just around the corner! Let’s jump into those step-by-step instructions that will have your kitchen smelling like heaven.
Unlocking Professional Cooking Techniques
Oh my gosh, have you ever wanted to dive into professional cooking? you know, whipping up those show-stopping cakes like the bake s'mores layer cake delightfully sweet ? it's totally achievable! here, i’ll break down some essential steps and techniques to make your cooking a breeze and maybe, just maybe, snag a few compliments at your next gathering.
Essential Preparation Steps
First things first, let’s chat mise en place . sounds fancy, right? but all it means is getting your ingredients ready before you start.
Chop this, measure that, and have everything at your fingertips. it’s like setting the stage for a play, where you’re the star!
Time management is key, too. when you’re baking that chocolate dessert, set a timer for everything. seriously, those few minutes can make or break your layers! try to break tasks into chunks.
Set aside time to prep, bake, and cool. this helps avoid that mad scramble when your cake layers are ready and you’re still prepping the frosting.
Organization is also a big deal. keep your workspace clean and tidy. if you're anything like me, the last thing you want is to accidentally mix sugar into your salt.
Safety comes first - know where your oven mitts are. burns are no joke, especially when you're trying to juggle everything.
Step-by-Step Process
Now, let’s get into the nitty-gritty with some clear, numbered instructions .
-
Preheat your oven to 350° F ( 175° C) and get those cake pans ready. Grease them up and line the bottoms with parchment paper for easy removal later.
-
Mix dry ingredients together in a large bowl - flour, sugar, cocoa powder, baking powder, baking soda, and salt.
-
Then, add in the wet ingredients : eggs, milk, vegetable oil, and vanilla extract. Beat until smooth.
-
Carefully stir in boiling water ( yes, really! ), making sure everything's combined.
-
Pour that luscious batter into your pans and bake for 25- 30 minutes . keep an eye on it! a toothpick should come out clean.
Let those layers cool for 10 minutes before transferring them to a rack.
-
For the graham cracker crust, mix crumbs, melted butter, and sugar. Press that mixture into a cake pan and bake for 10 minutes .
-
Make the marshmallow frosting by whipping the heavy cream until you see hints of soft peaks. Then, gradually mix in the powdered sugar and vanilla. Lastly, fold in those mini marshmallows.
-
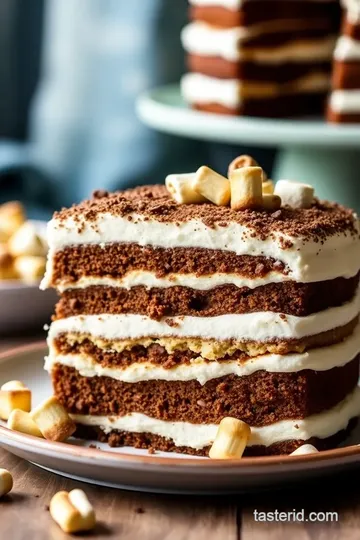
Time to assemble! layer a chocolate cake on your plate. slather on that marshmallow frosting, add the graham cracker crust, repeat, and finish with the last cake layer.
Cover the whole deal with the remaining frosting.
-
Chill for at least 30 minutes before serving. This helps everything set up nicely.
Expert Techniques
Now, let's get a bit more advanced. for that professional touch, check these critical steps. always control your temperatures . your oven should be spot on, and if you’re using a thermometer, aim for around 350° f ( 175° c) .
Timing precision is also crucial. Remember to keep that timer close! For the layers, visual cues are key. When they puff up and pull away from the sides, you know they’re ready.
If things aren’t going to plan, don't hit the panic button! if your layers are a bit dry, drizzle some simple syrup or even chocolate sauce for added moisture.
Keep your cake humid and soft.
Success Strategies
We’ve all been there - like when you forget to test your cakes and end up with dry layers. avoid those common mistakes! always test for doneness.
Also, let your cakes cool properly before frosting. nothing worse than a melty marshmallow disaster!
Safety tip: always double-check what you’re grabbing. Count your cake layers before you frost.
To have perfect results every time, try to use quality ingredients. real vanilla, good chocolate—you get the idea. and oh! have some make-ahead options like batch-baking! it saves you time on those jam-packed weekend gatherings.
Those nostalgic flavors can make anyone drool. Whether it's a birthday bash or a casual family dinner, s'mores-inspired desserts like this layered cake can turn any occasion into a festive one!
As we wrap this up, stay tuned for additional information . we’ll dive into more creative decorating tricks or even variations for that delightful s'mores cake, trusting your creative instincts.
Let's keep baking!
Pro Tips & Secrets for Baking Your S'mores Layer Cake
Let me tell ya, when it comes to baking this bake s'mores layer cake delightfully sweet , you gotta keep a few tricks up your sleeve.
First off, room temperature ingredients are the way to go. eggs and milk need to be warmed a bit before they hit the bowl.
This helps them blend better and gives your cake that fluffy texture we all love.
Time-saving techniques ? try mixing the dry ingredients ahead of time. seriously! on a busy day, prepping those in advance really helps.
Plus, when your cake is in the oven, you can whip up the marshmallow frosting and graham cracker crust without skipping a beat.
Multi-tasking is key!
Now, about flavor enhancement , if you really wanna take it up a notch, use high-quality cocoa powder. i swear, it makes all the difference! oh, and don’t skip that vanilla extract.
It adds this warm vibe that complements the chocolate and marshmallow perfectly.
Finally, let's chat presentation . i love to use a bench scraper to get those sides nice and smooth. it’s the little things, right? and if you're feeling extra fancy, sprinkle some crushed graham crackers on top of your frosted cake.
It adds texture and looks super cute!
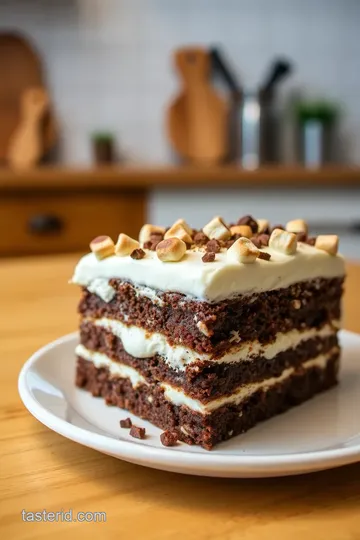
Perfect Presentation for Your Cake
So, once your delicious cake is baked and frosted, let’s make it instagram-ready! start by putting your first chocolate layer on a sturdy plate.
Spread a generous layer of that luscious marshmallow frosting right on top. don't hold back! always ensure there's a good amount in there because that’s what gives it the s'mores flair.
When you're stacking those layers, use color combinations to your advantage. the dark chocolate cake against the white marshmallow is so appealing! and if you have some chocolate sauce or roasted marshmallows handy, drizzle them over the top before serving for added visual allure.
Don’t forget the garnish ideas ! You can add a few mini marshmallows or even some chocolate shavings. They'll look cute and give a taste tease before the first bite.
Storage & Make-Ahead Tips
Planning ahead? you can totally make the layers in advance! just wrap each chocolate cake layer well in plastic wrap and store them in the fridge for up to three days .
They’ll be ready to frost when you are. speaking of storage, this cake is best stored in an airtight container in the fridge, but it's also fine at room temperature for a day or two.
Now, let’s talk about freshness duration . Your indulgent cake is good for about four to five days . It probably won’t last that long because it’s just so darn good, but you never know!
Creative Variations to Try
Oh, don’t be shy! get creative with your s'mores cake recipe . you can easily hook it up with a peanut butter surprise .
Just swirl in some peanut butter into your frosting mixture. you'll get that salty-sweet vibe that elevates everything.
For a seasonal twist , toss in some pumpkin spice during fall or fresh berries in summer. And if you’re catering to gluten-free folks, simply swap the flour for a gluten-free blend; they’ll appreciate it!
Think about regional variations too. How about an “Oreo version”? Mix crushed Oreos into that frosting or graham cracker crust. Trust me, every bite will be a memory in the making.
Complete Nutrition Guide
Let’s get real for a second. we all love our chocolate dessert , but knowing what’s in it helps us balance indulgence with health.
This layered wonder packs around 460 calories per slice . sure, it’s a treat, but it’s worth it! you’re getting a good dose of sugar and carbs from those chocolate cake layers, with a little protein from the heavy cream and marshmallows.
Pairing this cake with something refreshing or light, like fresh fruit, can balance the sweetness and make it feel like a complete meal—at least to me.
Keep portions in check, especially if it's a party; you probably don’t want to face the post-cake crash .
Conclusion: Your Sweet Adventure Awaits!
So there you have it! whether you’re whipping up this bake s'mores layer cake delightfully sweet for a birthday bash, summer picnic, or just because you’re feeling whimsical, these tips are gonna help you shine.
Remember to add your unique twist. after all, every great baker has their magic touch.
Get ready to wow your family and friends with an easy cake recipe that’s not just a dessert but a nostalgic experience .
You’ve got this! happy baking, and may your layers be ever so delightful!
Frequently Asked Questions
How do I bake S'mores Layer Cake Delightfully Sweet without it falling apart?
To ensure your Bake S'mores Layer Cake Delightfully Sweet holds together, be sure to let your cake layers cool completely before frosting. Additionally, using a sturdy cake board underneath can help support the layers, especially when decorated. If you experience difficulty with assembly, consider chilling the layers before stacking to prevent slippage.
Can I make this cake ahead of time?
Yes, you can make the Bake S'mores Layer Cake a day in advance! After assembling and frosting the cake, store it in the refrigerator. Just be sure to cover it with plastic wrap to maintain freshness. For best flavor and texture, bring it to room temperature before serving.
What are some variations I can try with my Bake S'mores Layer Cake?
There are plenty of delicious variations you can try! For a twist, add peanut butter to the marshmallow frosting or fold chocolate chips into the cake batter. You can also create a gluten-free version by substituting all-purpose flour with a suitable gluten-free blend, or use coconut cream for a dairy-free frosting option.
How should I store leftover S'mores Layer Cake?
Store leftover Bake S'mores Layer Cake in the refrigerator, covered in plastic wrap to keep it fresh for up to 3 days. If you want to keep it longer, consider freezing individual slices. Wrap each piece tightly in plastic wrap and place it in an airtight container, where it can last for about 2 months.
What kind of chocolate is best for the cake layers?
For the best flavor, it's recommended to use high-quality unsweetened cocoa powder for the cake layers. This will deliver a rich chocolate flavor that pairs perfectly with the marshmallow frosting. Look for brands that have a deep color, as this often indicates better quality.
Is the Bake S'mores Layer Cake suitable for special dietary needs?
Yes, the Bake S'mores Layer Cake can be made to accommodate different dietary needs! You can make a gluten-free version by using a gluten-free flour mix and use coconut cream in place of heavy cream for a dairy-free option. Additionally, consider using coconut sugar instead of granulated sugar for a less refined choice.
Bake S'mores Layer Cake Delightfully Sweet Card
⚖️ Ingredients:
- 2 cups all-purpose flour
- 2 cups granulated sugar
- 3/4 cup unsweetened cocoa powder
- 1 1/2 teaspoons baking powder
- 1 1/2 teaspoons baking soda
- 1 teaspoon salt
- 2 large eggs, at room temperature
- 1 cup whole milk
- 1/2 cup vegetable oil
- 2 teaspoons vanilla extract
- 1 cup boiling water
- 1 cup heavy cream
- 1 1/2 cups powdered sugar
- 1 teaspoon vanilla extract
- 1 1/2 cups mini marshmallows
- 1 1/2 cups graham cracker crumbs
- 1/2 cup unsalted butter, melted
- 1/4 cup granulated sugar
🥄 Instructions:
- Step 1: Preheat the oven to 350°F (175°C) and grease the cake pans. Line the bottoms with parchment paper and grease the paper.
- Step 2: In a large mixing bowl, whisk together the dry ingredients (flour, sugar, cocoa powder, baking powder, baking soda, and salt).
- Step 3: Add the eggs, milk, oil, and vanilla extract. Beat until combined. Carefully stir in the boiling water until the batter is smooth.
- Step 4: Divide the batter evenly between the prepared pans. Bake for 25-30 minutes or until a toothpick comes out clean. Cool in the pans for 10 minutes before transferring to a cooling rack.
- Step 5: In a bowl, combine graham cracker crumbs, melted butter, and sugar. Mix until well combined. Press mixture into the bottom of a parchment-lined 9-inch cake pan. Bake for 10 minutes; let cool.
- Step 6: In a mixing bowl, whip the heavy cream until soft peaks form. Gradually add powdered sugar and vanilla extract while continuing to beat until stiff peaks form. Gently fold in the mini marshmallows.
- Step 7: Place one chocolate cake layer on a serving plate and spread a layer of marshmallow frosting on top. Add the graham cracker crust layer, then repeat with another cake layer and frosting.
- Step 8: Top with the final cake layer and cover the entire cake with the remaining frosting.
- Step 9: Decorate the top with extra mini marshmallows and, if desired, lightly torch them for a toasted finish. Chill the cake for at least 30 minutes before slicing and serving.
Previous Recipe: Easy Whisked Lavender Matcha Latte Bliss: A Cozy Herbal Delight
Next Recipe: Easy & Flavorful Bake Cuban Bread with Buttery Garlic Goodness: A Family Favorite